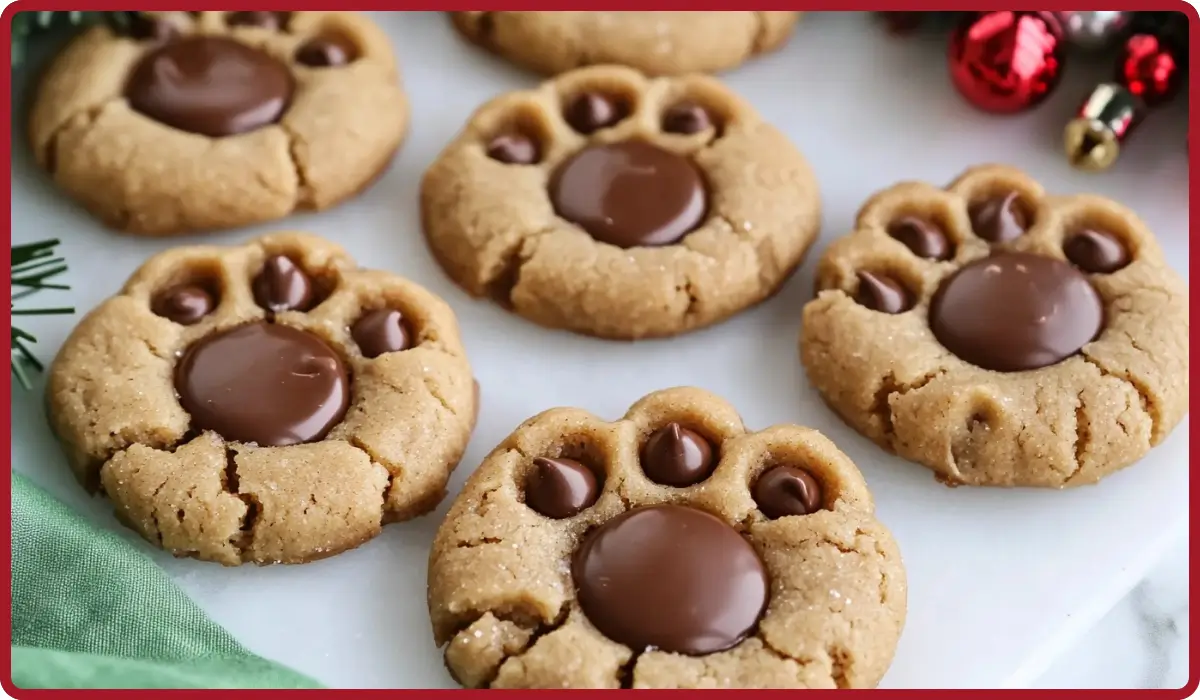
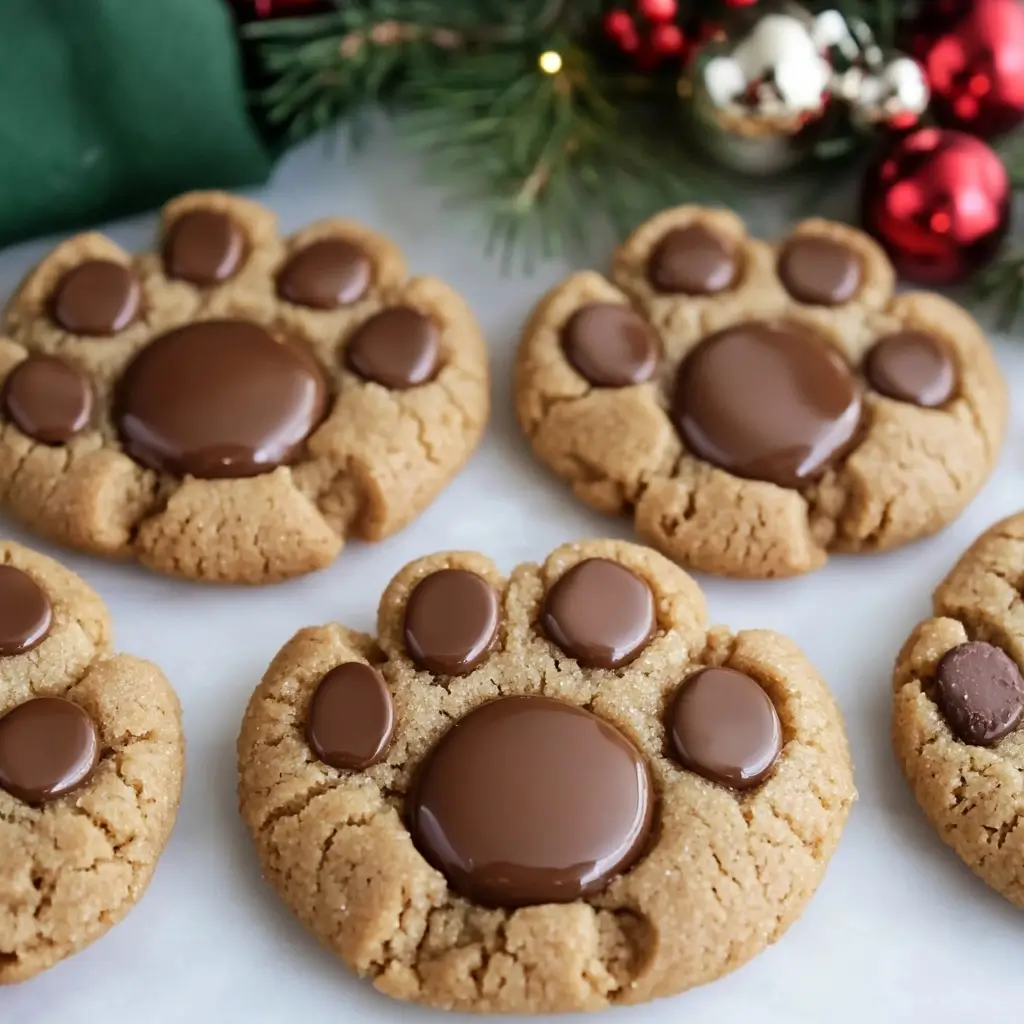
Have you ever made something so cute that eating it felt like a small crime against art? That’s exactly how my friend felt when I brought these Peanut Butter Paw Print Cookies to their birthday party. With their irresistibly soft texture, rich peanut butter flavor, and those adorable chocolate paw prints, they’re the kind of cookies that get everyone smiling—even before the first bite.
These cookies aren’t just a treat for the taste buds; they’re also a joy to make. Whether you’re looking to bake a fun dessert for a party, a cozy weekend project with the kids, or just because you deserve some peanut buttery goodness, this recipe is foolproof.
Why You’ll Love These Peanut Butter Paw Print Cookies
1. Peanut Butter Lovers’ Dream: These cookies are rich with creamy peanut butter, offering the perfect balance of sweet and salty in every bite.
2. Easy to Make: With simple steps and common pantry ingredients, these cookies come together quickly.
3. Adorable Design: The paw print chocolate decorations make these cookies stand out at any gathering. They’re almost too cute to eat—almost.
4. Perfect Texture: Soft, chewy, and slightly crisp on the outside, these cookies are baked to perfection every time.
5. Kid-Friendly: From rolling the dough balls to pressing the chocolate decorations, kids will love helping you make these delightful treats.
Ingredients You’ll Need
Wet Ingredients:
- Unsalted Butter (½ cup or 113g): Softened butter provides the creamy base for these cookies.
- Creamy Peanut Butter (1 cup or 256g): The star of the show, adding richness and flavor.
- Granulated Sugar (1 cup or 200g): For sweetness and a hint of crunch if you roll the dough balls in sugar.
- Light Brown Sugar (½ cup or 100g): Packed brown sugar adds a touch of molasses flavor and extra chewiness.
- Large Eggs (2): Eggs help bind the dough and provide structure.
- Vanilla Extract (½ teaspoon): Just a splash to enhance the flavor.
Dry Ingredients:
- All-Purpose Flour (2 cups or 250g): The foundation of the cookie dough.
- Baking Soda (2 teaspoons): To help the cookies rise and puff up beautifully.
- Salt (½ teaspoon): Balances the sweetness and highlights the peanut butter flavor.
Toppings:
- Milk Chocolate Melting Wafers (48): These become the “paw pads” for the cookies.
- Milk Chocolate Chips (144): Three per cookie to create the cutest little “toes.”
Step-by-Step Instructions for the Perfect Cookies
Preheat Your Oven
Before you get started on the dough, preheat your oven to 350°F (175°C). Line your baking sheets with parchment paper or silicone baking mats to prevent sticking and make cleanup a breeze.
Cream the Wet Ingredients
In a large mixing bowl, cream together the softened butter, peanut butter, granulated sugar, and light brown sugar until the mixture is smooth and fluffy. This step is crucial for ensuring your cookies have a tender, melt-in-your-mouth texture. Add the eggs one at a time, mixing well after each addition. Finally, stir in the vanilla extract.
Combine the Dry Ingredients
In a separate bowl, whisk together the all-purpose flour, baking soda, and salt. This ensures even distribution of the leavening agents, so your cookies bake evenly.
Mix the Dough
Gradually add the dry ingredients to the wet ingredients, mixing just until combined. Be careful not to overmix, as this can make your cookies tough. The dough should be soft and slightly sticky.
Shape the Cookies
Using a small cookie scoop or your hands, roll about one tablespoon of dough into a ball. For an optional touch of texture and sweetness, roll each dough ball in granulated sugar. Place the dough balls onto your prepared baking sheets, leaving about two inches between each cookie.
Bake to Perfection
Bake the cookies in the preheated oven for 8–10 minutes. You’ll know they’re ready when they’re puffy and just set. Avoid overbaking; the cookies will continue to firm up as they cool.
Decorate with Chocolate
Here’s where the magic happens! As soon as you take the cookies out of the oven, press one milk chocolate melting wafer into the center of each cookie to form the “paw pad.” Then, arrange three milk chocolate chips above the wafer for the “toes.” Press them gently into the warm cookies so they stick without sinking.
Cool and Set
Let the cookies cool on the baking sheet for about two minutes before transferring them to a wire rack. This step ensures they hold their shape while the chocolate sets.
How to Serve Your Paw Print Cookies
- For Parties: Arrange them on a platter for an eye-catching dessert table centerpiece.
- With Milk: There’s nothing like a tall glass of milk to complement the rich peanut butter and chocolate flavors.
- As Gifts: Package them in cute boxes or tins for a thoughtful, homemade present.
Tips for Baking Success
- Room Temperature Ingredients: Ensure the butter and eggs are at room temperature for easier mixing and a smoother dough.
- Don’t Skip the Sugar Roll: If you love a little crunch, rolling the dough balls in granulated sugar adds a delightful texture to the finished cookies.
- Use High-Quality Chocolate: Splurge on good chocolate for the toppings—it makes a big difference in taste and appearance.
- Keep an Eye on the Oven: Overbaking can dry out these cookies, so remove them as soon as they’re set and still soft.
- Chill the Dough (Optional): If your kitchen is warm, chilling the dough for 20–30 minutes can make it easier to handle.
Variations to Try
- Nut-Free: Use sunflower seed butter or a similar alternative to make these cookies safe for nut allergies.
- Gluten-Free: Substitute the all-purpose flour with a gluten-free flour blend.
- Dark Chocolate Lover: Swap the milk chocolate toppings for dark chocolate for a richer flavor.
- Festive Flair: Use colored candy melts for the paw pads to match holiday themes or party colors.
Storing and Freezing
To store your cookies, place them in an airtight container at room temperature for up to three days. For longer storage, freeze the baked cookies in a single layer on a baking sheet, then transfer them to a freezer-safe container. They’ll keep for up to three months. When you’re ready to enjoy them, thaw at room temperature and warm slightly if desired.
Frequently Asked Questions
1. Can I use crunchy peanut butter?
Absolutely! Crunchy peanut butter will add a delightful texture to the cookies.
2. Can I freeze the cookie dough?
Yes! Roll the dough into balls and freeze them on a baking sheet. Once frozen, transfer them to a freezer bag. When ready to bake, add an extra minute or two to the baking time.
3. What if I don’t have melting wafers?
You can use a piece of a chocolate bar or a dollop of melted chocolate instead.
4. Can I make these cookies vegan?
With a few swaps—like vegan butter, egg replacer, and dairy-free chocolate—you can make these cookies vegan-friendly.
Final Thoughts
There you have it—a recipe that’s as fun to make as it is delicious to eat. These Peanut Butter Paw Print Cookies are a guaranteed hit for any occasion. They’re cute, customizable, and packed with flavor that’ll have everyone asking for seconds.
So, grab your mixing bowl and preheat that oven. I can’t wait to see your creations! Share your photos and tips in the comments or tag me on social media—I’d love to see how your cookies turn out. Let’s spread some peanut buttery joy, one adorable paw print at a time. 🐾🍪
Print
Peanut Butter Paw Print Cookies – Adorable & Easy Recipe
- Total Time: 47 minutes
- Yield: 48 cookies 1x
- Diet: Vegetarian
Description
Soft and chewy Peanut Butter Paw Print Cookies with a rich peanut butter base and chocolate paw accents. Perfect for parties, gifts, or everyday treats!
Ingredients
- Wet Ingredients:
½ cup unsalted butter, softened
1 cup creamy peanut butter
1 cup granulated sugar
½ cup light brown sugar, packed
2 large eggs
½ teaspoon vanilla extract - Dry Ingredients:
2 cups all-purpose flour
2 teaspoons baking soda
½ teaspoon salt - Topping:
48 milk chocolate melting wafers
144 milk chocolate chips
Instructions
- Preheat oven to 350°F (175°C) and line baking sheets.
- Cream butter, peanut butter, granulated sugar, and brown sugar. Add eggs and vanilla; mix well.
- In another bowl, whisk flour, baking soda, and salt. Gradually mix with wet ingredients to form a soft dough.
- Roll dough into balls, optionally coat with sugar, and place on baking sheets.
- Bake for 8–10 minutes until just set.
- While warm, press a chocolate wafer in the center and three chips above for the paw print.
- Cool on sheets for 2 minutes, then transfer to wire racks.
Notes
- Chill the dough if too sticky.
- Use high-quality chocolate for the best results.
- Store in airtight containers for up to 3 days.
- Prep Time: 15 minutes
- Cook Time: 32 minutes
- Category: Dessert
- Method: Baking
- Cuisine: American

