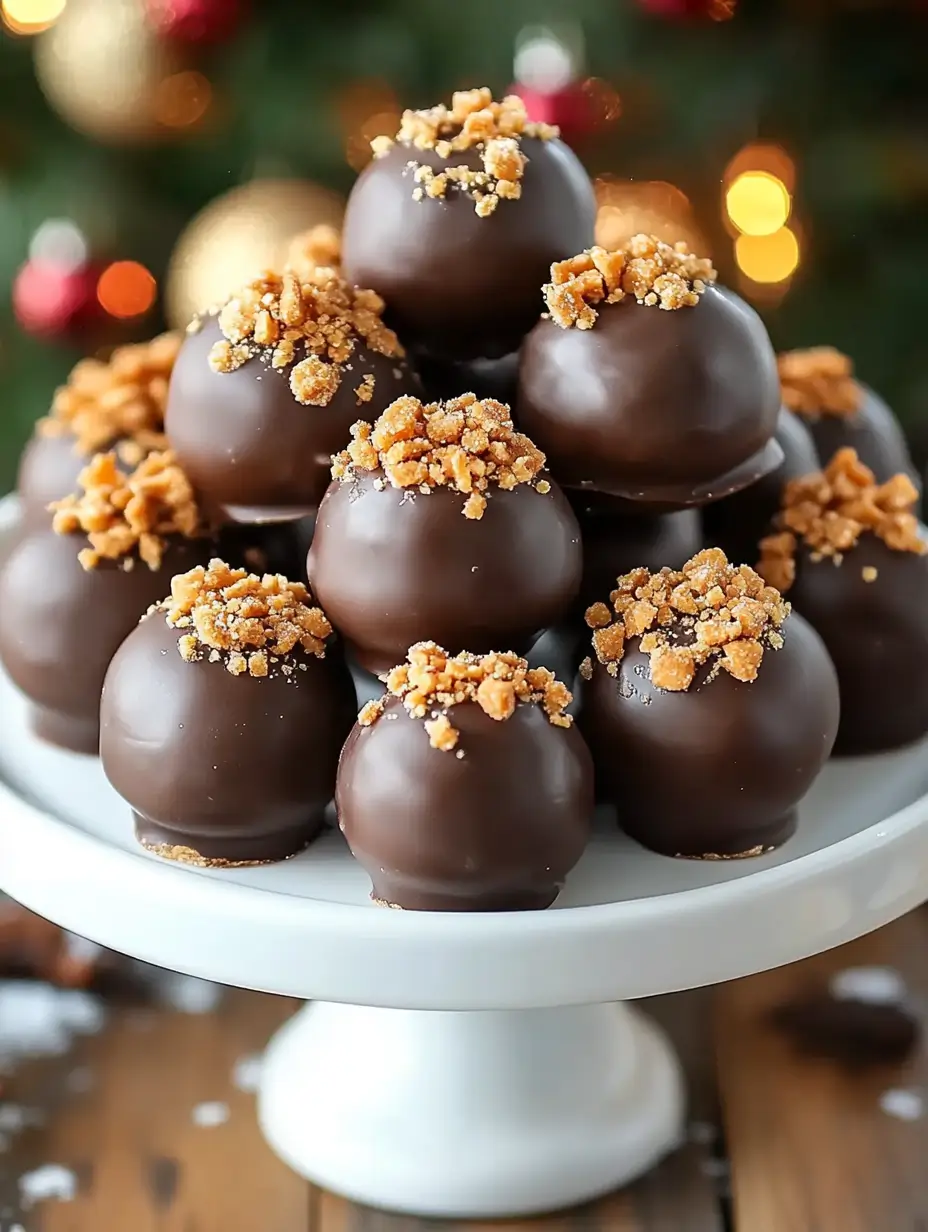
There’s something irresistible about bite-sized treats, isn’t there? These easy Butterfinger Balls are the perfect combination of creamy, crunchy, and sweet. If you’re a fan of the classic Butterfinger candy bar, you’re going to fall head over heels for this recipe. Whether you’re whipping them up for a party, a potluck, or just a cozy night in, these little morsels are guaranteed to please.
I first discovered this recipe when looking for a quick and fun dessert that didn’t require baking (because, let’s face it, some days you just don’t want to turn on the oven). The result was a treat so addictive that they’ve become a family favorite. Plus, they’re super customizable—you can coat them in chocolate for extra indulgence or enjoy them plain for a lighter option.
Let’s dive into what makes these Butterfinger Balls a must-try treat.
Why You’ll Love This EASY BUTTERFINGER BALLS
- Simple and Quick: With minimal ingredients and no need for baking, this recipe comes together in under an hour.
- Perfect for All Occasions: These sweet treats are ideal for holidays, parties, or even as a casual snack.
- Rich and Creamy: The peanut butter base is smooth and decadent, perfectly balanced by the crunch of Butterfinger pieces.
- Customizable: You can dip them in chocolate, sprinkle them with extra crushed candy, or leave them plain—whatever suits your taste.
- Make-Ahead Friendly: They store well, so you can prepare them in advance for stress-free entertaining.
Preparation Time and Servings
- Prep Time: 20 minutes
- Chill Time: 30 minutes
- Total Time: 50 minutes
- Servings: Approximately 24 balls
Nutrition (per serving): Calories: 180, Fat: 10g, Carbohydrates: 21g, Protein: 3g
Ingredients
Here’s everything you’ll need to make these easy Butterfinger Balls:
- 1 cup creamy peanut butter: Choose a smooth variety for the best texture.
- 1/4 cup unsalted butter, softened: This adds richness and helps bind the mixture.
- 2 cups powdered sugar: For sweetness and structure.
- 1 teaspoon vanilla extract: Enhances the overall flavor.
- Pinch of salt: Balances the sweetness.
- 6 Butterfinger candy bars, finely crushed: These provide that signature crunch and flavor.
- 12 ounces semisweet or milk chocolate, chopped (optional): For dipping, if desired.
Ingredient Notes
- Butterfinger Bars: If you can’t find Butterfinger bars, other toffee or peanut butter candy bars can work as substitutes.
- Chocolate Options: Use semisweet chocolate for a balanced flavor, or opt for milk chocolate if you prefer something sweeter.
Step-by-Step Instructions
Step 1: Prepare the Peanut Butter Mixture
In a large mixing bowl, combine the peanut butter, softened unsalted butter, powdered sugar, vanilla extract, and a pinch of salt. Mix until the ingredients are well combined and the texture is smooth. You can use an electric mixer for convenience, but mixing by hand with a sturdy spoon or spatula works just as well.
Pro Tip: If the mixture feels too sticky, pop it into the refrigerator for 10-15 minutes to firm up slightly before forming the balls.
Step 2: Add the Butterfinger Crunch
Fold in the finely crushed Butterfinger candy bars. Make sure they’re evenly distributed throughout the mixture so every bite has a delicious crunch.
Step 3: Shape the Balls
Line a baking sheet with parchment paper or wax paper. Using a tablespoon or a small cookie scoop, portion out the peanut butter mixture. Roll each portion into a ball between your palms and place them on the prepared baking sheet.
Helpful Hint: Lightly coat your hands with a bit of powdered sugar or cooking spray to prevent sticking while rolling the balls.
Step 4: Melt the Chocolate (Optional)
If you’re dipping the Butterfinger Balls in chocolate, melt the chopped chocolate in a small saucepan over low heat. Stir constantly to ensure the chocolate doesn’t burn. Alternatively, you can melt it in the microwave in 20-second intervals, stirring after each interval until smooth.
Step 5: Dip and Coat
Using a fork or dipping tools, lower each ball into the melted chocolate, making sure it’s fully coated. Tap the fork gently on the edge of the bowl to remove any excess chocolate. Return the coated balls to the baking sheet.
Optional Topping: Sprinkle some additional crushed Butterfinger pieces on top of the chocolate-coated balls for extra flair.
Step 6: Chill and Set
Place the baking sheet in the refrigerator for about 30 minutes, or until the chocolate coating is completely set.
Step 7: Serve and Enjoy
Once the Butterfinger Balls are firm, transfer them to an airtight container for storage. These treats are best enjoyed chilled or at room temperature.
How to Serve
These Butterfinger Balls are versatile and can be served in various ways:
- As a Dessert Platter: Arrange them on a decorative tray with a mix of other bite-sized treats.
- With Coffee or Tea: Their rich, sweet flavor pairs beautifully with a warm drink.
- For Gifting: Place them in a festive tin or box lined with parchment paper for a thoughtful homemade gift.
Additional Tips
- Crush the Candy Bars Easily: Place the Butterfinger bars in a zip-top bag and crush them with a rolling pin for easy cleanup.
- Don’t Skip the Chill Time: This step helps the balls firm up and ensures the chocolate coating sets properly.
- Double the Recipe: These are always a hit at parties, so consider making a double batch!
- Customize the Coating: If you’re feeling adventurous, roll the balls in crushed nuts, sprinkles, or cocoa powder instead of dipping them in chocolate.
- Use Quality Chocolate: High-quality chocolate will make a noticeable difference in flavor and texture.
Recipe Variations
- No-Chocolate Version: Skip the dipping and enjoy these treats plain for a lighter option.
- White Chocolate Coating: Swap semisweet chocolate for white chocolate for a different flavor profile.
- Gluten-Free Option: Ensure the Butterfinger bars and other ingredients are certified gluten-free.
- Add a Pop of Color: Decorate the chocolate coating with colored sprinkles for festive occasions.
- Peanut-Free Alternative: Use sunflower seed butter in place of peanut butter and replace Butterfinger bars with a nut-free candy.
Freezing and Storage
- Storage: Store the Butterfinger Balls in an airtight container in the refrigerator for up to 1 week.
- Freezing: These treats freeze beautifully. Arrange them in a single layer on a baking sheet and freeze until solid, then transfer them to a freezer-safe container. They can be frozen for up to 3 months. Thaw in the refrigerator before serving.
Special Equipment
- Mixing Bowl: For combining the ingredients.
- Cookie Scoop: Makes portioning the mixture quick and uniform.
- Parchment Paper: Prevents sticking during the chilling process.
- Microwave or Double Boiler: For melting the chocolate.
Frequently Asked Questions
1. Can I use natural peanut butter?
Yes, but natural peanut butter tends to separate, so you’ll need to mix it well before using.
2. Can I make these ahead of time?
Absolutely! These are great for prepping in advance and can be stored in the fridge or freezer.
3. What if I don’t have Butterfinger bars?
You can substitute with other crunchy candy bars like Heath or Crunch bars, though the flavor will vary slightly.
4. How can I make them less sweet?
Use dark chocolate for dipping to balance the sweetness of the peanut butter mixture.
5. Can I skip the salt?
A pinch of salt enhances the flavors, but you can omit it if desired.
Conclusion
I can’t wait for you to try these Easy Butterfinger Balls! They’re fun to make, delicious to eat, and sure to become a favorite in your home just like they are in mine. Whether you’re indulging solo, sharing with friends, or gifting them to loved ones, these treats are a guaranteed crowd-pleaser.
If you try this recipe, let me know how it turns out! Leave a comment below or share a photo on social media. I’d love to see your creations!
Print
Easy Butterfinger Balls Recipe – No Bake and Perfect for Parties
- Total Time: 50 minutes
- Yield: 24 balls 1x
- Diet: Vegetarian
Description
These no-bake Butterfinger Balls are quick, easy, and utterly delicious. Made with peanut butter, crushed Butterfinger candy, and optional chocolate coating, they’re the perfect sweet treat for any occasion.
Ingredients
- 1 cup creamy peanut butter
- 1/4 cup unsalted butter, softened
- 2 cups powdered sugar
- 1 teaspoon vanilla extract
- Pinch of salt
- 6 Butterfinger candy bars, finely crushed
- 12 ounces semisweet or milk chocolate, chopped (optional for dipping)
Instructions
- In a mixing bowl, combine peanut butter, softened butter, powdered sugar, vanilla, and salt until smooth.
- Fold in crushed Butterfinger candy bars.
- Line a baking sheet with parchment paper. Roll tablespoon-sized portions of the mixture into balls and place on the sheet.
- (Optional) Melt chocolate and dip balls to coat. Tap off excess chocolate and return to the baking sheet.
- Chill for 30 minutes in the fridge until set.
- Store in an airtight container and enjoy!
Notes
- Use natural peanut butter for a less sweet option.
- Freeze for up to 3 months for longer storage.
- Prep Time: 20 minutes
- Cook Time: No cook
- Category: Dessert
- Method: No-Bake
- Cuisine: American

