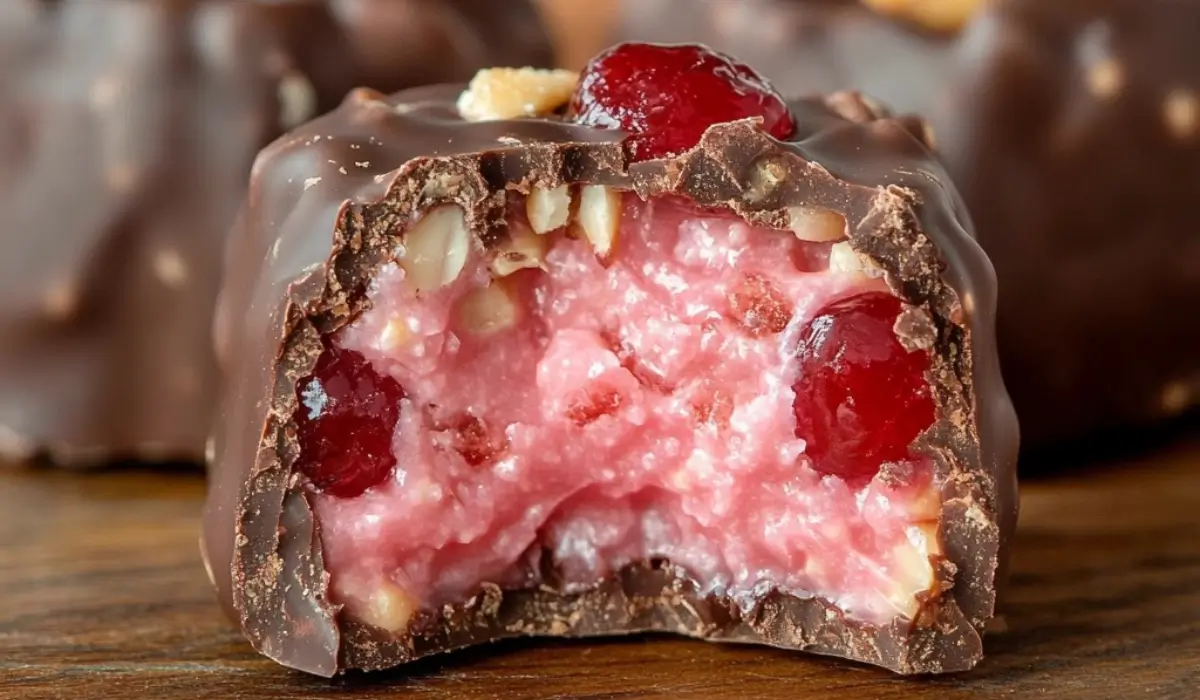
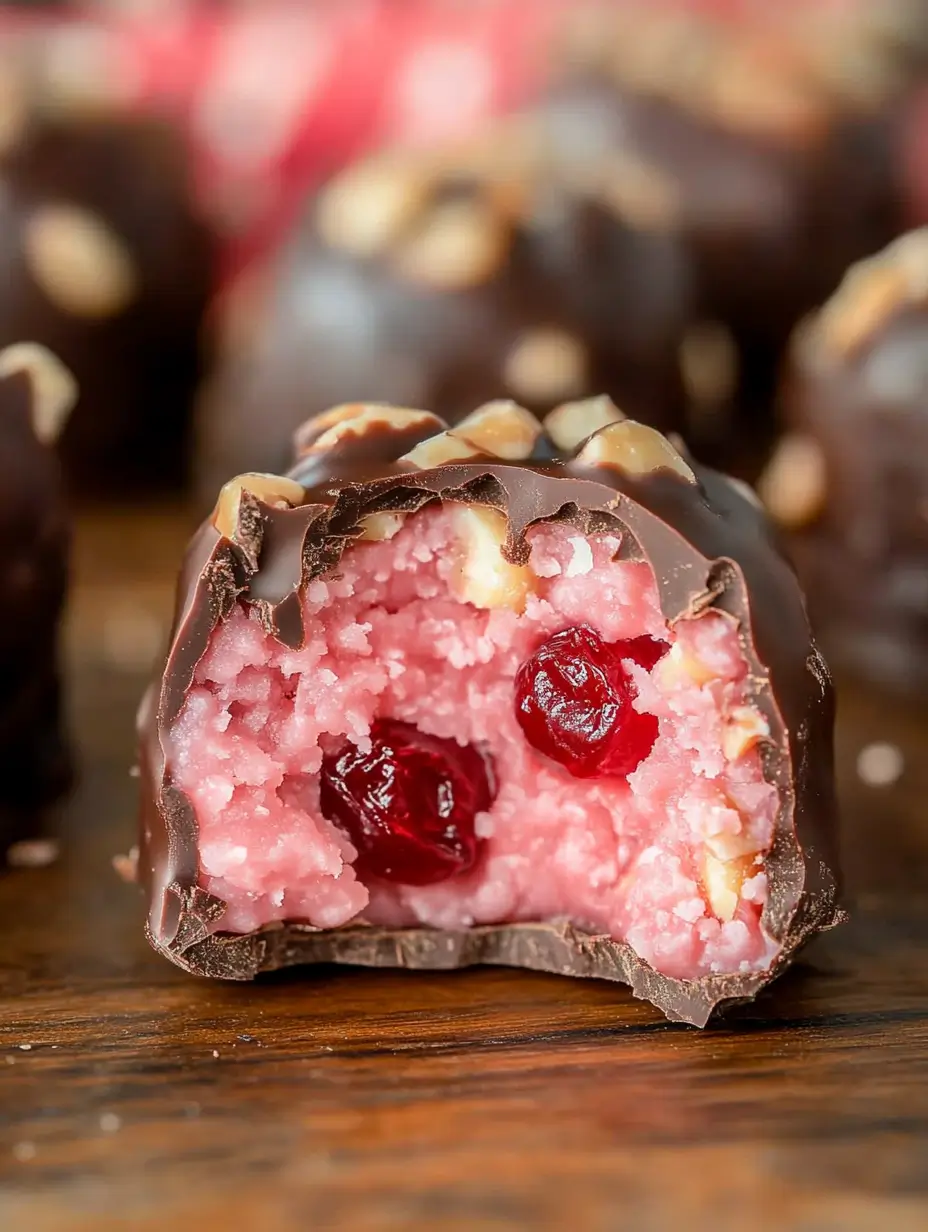
There’s something timeless about homemade candy. It’s more than just sugar and chocolate—it’s memories wrapped in a sweet, little package. And if you’ve never tried Cherry Mash candy, you’re in for a treat. This old-fashioned candy combines the sweetness of cherries, the crunch of peanuts, and the richness of chocolate for a flavor combination that’s truly unforgettable.
Cherry Mash holds a special place in the hearts of many, and for good reason. It’s the perfect mix of creamy, fruity, and nutty textures, making it a standout among homemade sweets. Whether you’re looking for a holiday gift, a party treat, or a nostalgic indulgence, this recipe will deliver.
I first came across Cherry Mash at a local candy store during a family trip, and I’ve been hooked ever since. The bright cherry center surrounded by a crunchy chocolate-peanut coating felt like a little slice of heaven. Over the years, I’ve refined this homemade version, and now it’s a staple in my kitchen every holiday season.
In this article, I’ll guide you through the steps to make your very own Cherry Mash candy. Whether you’re a seasoned candy maker or a complete beginner, don’t worry—I’ll break everything down into simple, manageable steps.
Why You’ll Love This Cherry Mash Candy Recipe
1. Easy to Make: Don’t let the idea of making candy intimidate you! This recipe requires minimal tools and only a few simple steps.
2. Unique Flavor: The cherry and almond-infused filling paired with the rich chocolate and crunchy peanuts is a combination that’s truly one of a kind.
3. Perfect for Sharing: These little candies are great for gifting or serving at parties. They’re bite-sized, portable, and always a hit with guests.
4. Nostalgic Appeal: Cherry Mash has been a beloved classic for generations. Making your own brings a sense of nostalgia and pride.
5. Fun for All Ages: This recipe is an excellent family activity. Kids love rolling the cherry filling into balls, and everyone enjoys dipping them into chocolate.
Preparation Time and Servings
- Total Time: About 2 hours (including freezing time)
- Servings: Makes approximately 30 candies
- Calories per Serving: 150
- Nutritional Info per Candy: Protein: 2g, Carbs: 17g, Fat: 8g
Ingredients
Here’s what you’ll need to create this delightful treat:
For the Cherry Filling:
- 1 pound powdered sugar (~4.5 cups or 453g): The base for the sweet, fluffy filling.
- 6 tablespoons unsalted butter, softened (85g): Adds richness and helps bind the filling.
- 1/2 teaspoon vanilla extract: Enhances the overall flavor.
- 1/2 teaspoon almond extract: Complements the cherries with a subtle, nutty flavor.
- 3 tablespoons sweetened condensed milk (64g): Provides a creamy texture and sweetness.
- 1 10-ounce jar of maraschino cherries, drained and chopped (133g): The star of the show, bringing bright cherry flavor and color.
For the Coating:
- 20 ounces total chocolate: Use a combination of 10 ounces almond bark and 10 ounces bittersweet chocolate chips for the perfect balance of sweetness and richness.
- 1 1/4 cup cocktail peanuts, chopped (180g): Adds a salty, crunchy contrast to the sweet center.
Step-by-Step Instructions
Let’s get started! Follow these steps, and you’ll have a batch of Cherry Mash candies in no time.
1: Prepare the Baking Sheet
- Line a baking sheet with parchment paper. This will prevent the cherry filling from sticking during freezing. Set aside.
2: Make the Cherry Filling
- Add the powdered sugar, softened butter, vanilla extract, almond extract, sweetened condensed milk, and chopped maraschino cherries to the bowl of your stand mixer.
- Start mixing on low speed for about 30 seconds until the powdered sugar is incorporated into the butter.
- Increase the speed to medium and mix for 2 minutes. Stop to scrape down the sides of the bowl.
- Continue mixing for an additional 2 minutes until the mixture is well combined and fluffy. If it’s not quite fluffy, mix on high for one more minute.
Pro Tip: If your filling feels too soft, you can refrigerate it for 10–15 minutes before moving on to the next step.
3: Shape the Candy Centers
- Scoop the filling onto the prepared baking sheet using a spoon or small cookie scoop. Freeze for 1 hour.
- Once the filling is firm, remove it from the freezer.
- Roll each scoop into a smooth ball using the palms of your hands. Work quickly, as the warmth of your hands can soften the filling.
- Return the shaped centers to the baking sheet and freeze for an additional 30 minutes.
4: Prepare the Chocolate Coating
- Chop the almond bark and bittersweet chocolate into small pieces. Place them in a microwave-safe bowl.
- Microwave the chocolate in 30-second intervals, stirring after each interval, until completely melted.
- Stir the chopped peanuts into the melted chocolate, ensuring they are evenly distributed.
5: Dip the Candy Centers
- Remove the frozen candy centers from the freezer.
- Using a fork, dip each candy center into the chocolate-peanut mixture, ensuring it is fully coated.
- Lift the candy out of the chocolate, letting the excess drip off, and place it onto a clean piece of parchment paper.
- Repeat with all the candy centers. Work quickly to prevent the frozen centers from softening too much.
Pro Tip: If the chocolate begins to cool and thicken while you’re dipping, reheat it in the microwave in 15-second intervals.
6: Allow the Candy to Set
- Let the dipped candies sit at room temperature until the chocolate has hardened completely. This usually takes about 30 minutes.
How to Serve
Cherry Mash candy is as versatile as it is delicious. Here are a few serving ideas:
- As a Dessert Table Star: Display these candies on a decorative plate or tiered tray.
- In Gift Boxes: Wrap them in cellophane bags or place them in small boxes for a homemade holiday gift.
- As a Sweet Snack: Keep a few in an airtight container for when you need a quick treat.
Additional Tips for Success
- Drain the Cherries Well: Excess liquid can make the filling too wet and difficult to shape. Pat the cherries dry with paper towels before chopping.
- Work in Batches: If you’re dipping the candies solo, try working with half the batch at a time while keeping the others in the freezer.
- Use Fresh Peanuts: For the best flavor, chop fresh cocktail peanuts right before making the coating.
- Temperature Control: Keep the candy centers frozen until just before dipping to maintain their shape.
- Customize the Chocolate: You can experiment with white chocolate or milk chocolate for a different flavor profile.
Recipe Variations
One of the best things about Cherry Mash candy is how easily you can adapt it to your preferences:
- Gluten-Free: Double-check that your chocolate and peanuts are gluten-free, and you’re good to go.
- Dairy-Free: Substitute dairy-free butter and sweetened condensed milk alternatives.
- Nut-Free: Skip the peanuts and use crushed pretzels or crispy rice cereal in the chocolate coating instead.
- Extra Crunch: Add crushed toffee bits or cookie crumbs to the chocolate coating.
- Different Fruit: Swap the cherries for chopped dried cranberries or strawberries for a fun twist.
Freezing and Storage
These candies store beautifully, making them ideal for preparing ahead of time:
- Storage: Store the candies in an airtight container at room temperature for up to 5 days, or refrigerate for up to 2 weeks.
- Freezing: Place the candies in a single layer on a baking sheet and freeze until solid. Transfer them to a freezer-safe container or bag, and store for up to 3 months.
When ready to enjoy, let the candies thaw at room temperature for 15–20 minutes.
Special Equipment
While you don’t need fancy tools for this recipe, a few basic items can make the process even smoother:
- Stand Mixer: Perfect for whipping up the cherry filling quickly and evenly.
- Parchment Paper: A lifesaver for preventing sticking during freezing and dipping.
- Fork or Candy Dipping Tool: Makes coating the candies a breeze.
FAQ
1. Can I use fresh cherries instead of maraschino cherries?
Yes, but fresh cherries need to be pitted and chopped, and they’ll add more moisture. You may need to increase the powdered sugar slightly to balance the texture.
2. How can I prevent the chocolate from hardening too quickly?
If your workspace is chilly, the chocolate might set faster. Keep a small bowl of warm water nearby to reheat the chocolate bowl as needed.
3. What’s the best way to chop the peanuts?
Use a food processor for even pieces, or place them in a zip-top bag and crush them with a rolling pin for a more rustic texture.
Conclusion
Cherry Mash candy is the perfect combination of old-fashioned charm and homemade goodness. Whether you’re sharing them with loved ones or treating yourself, these candies are sure to bring a smile to anyone’s face. I’d love to hear how your batch turns out—snap a photo and tag me on social media or leave a comment below!
So, grab your ingredients and let’s get started. You’re just a few steps away from sweet, cherry-filled perfection! 🍒
Print
Cherry Mash Candy Recipe: A Sweet Nostalgic Treat
- Total Time: 2 hours (including freezing)
- Yield: 30 candies 1x
- Diet: Vegetarian
Description
This homemade Cherry Mash Candy combines a sweet cherry-almond filling with a crunchy chocolate-peanut coating. Perfect for gifting or indulging!
Ingredients
- 1 pound powdered sugar (~4.5 cups or 453g)
- 6 tablespoons unsalted butter, softened (85g)
- 1/2 teaspoon vanilla extract
- 1/2 teaspoon almond extract
- 3 tablespoons sweetened condensed milk (64g)
- 1 10-ounce jar of maraschino cherries, drained and chopped (133g)
- 20 ounces total chocolate (10 oz almond bark + 10 oz bittersweet chocolate chips)
- 1 1/4 cup cocktail peanuts, chopped (180g)
Instructions
- Line a baking sheet with parchment paper.
- Mix powdered sugar, butter, extracts, condensed milk, and cherries until fluffy.
- Freeze scooped filling for 1 hour.
- Roll frozen filling into balls and freeze again for 30 minutes.
- Melt chocolate and stir in chopped peanuts.
- Dip frozen centers into chocolate-peanut mixture and let harden.
Notes
- Drain cherries well to avoid excess moisture.
- Store in an airtight container for up to 2 weeks or freeze for longer storage.
- Prep Time: 15 minutes
- Cook Time: 0 minutes
- Category: Dessert
- Method: No-Bake
- Cuisine: American

