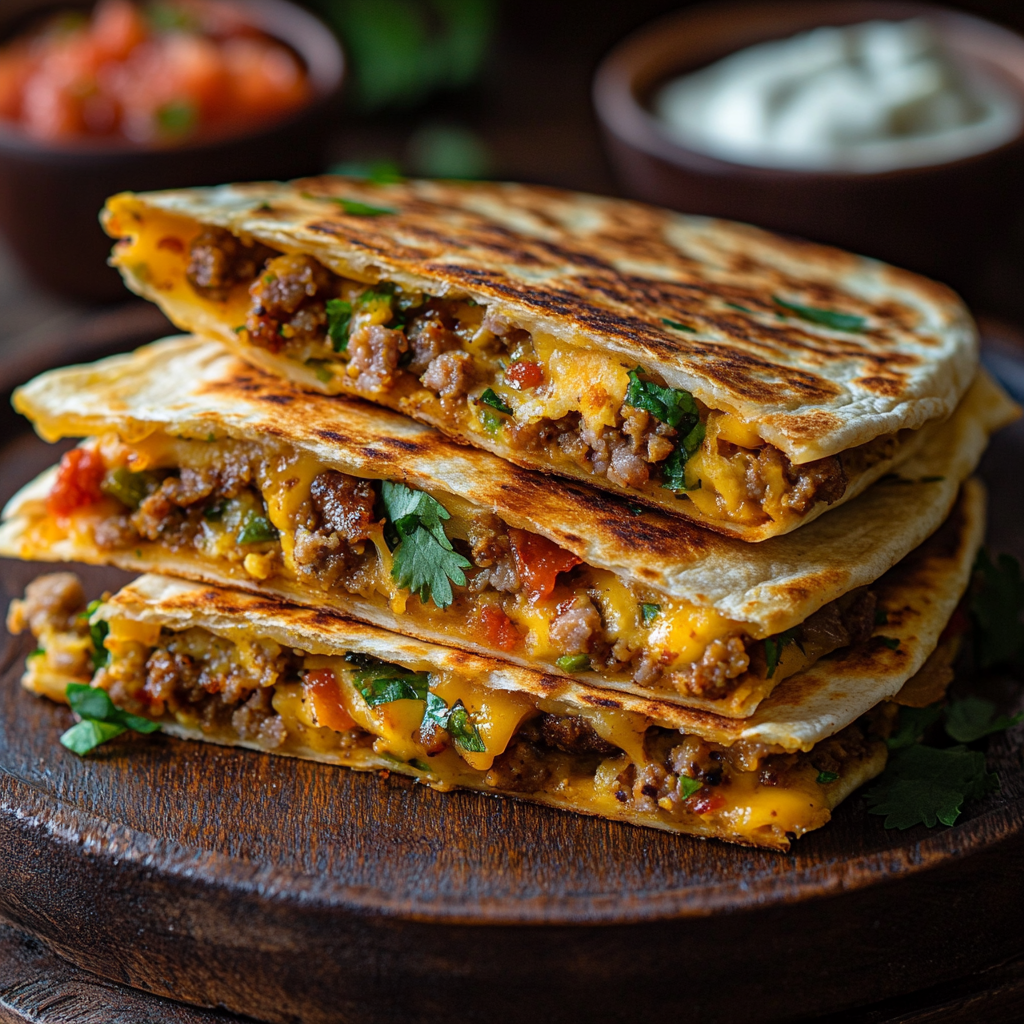
There’s a special kind of joy in combining two classic comfort foods into one dish. That’s exactly what cheeseburger quesadillas are—a perfect fusion of juicy, flavorful cheeseburgers and golden, crispy quesadillas. The combination is downright addictive, and it’s one of those recipes that’s as fun to make as it is to eat.
I first whipped these up on a night when I wanted all the cheeseburger flavor but didn’t feel like firing up the grill. After a few bites, everyone at the table was hooked. Each quesadilla has that melty, gooey cheese, seasoned beef, and a satisfyingly crisp tortilla. It’s the perfect mix of textures and flavors, plus, it’s ready in under 30 minutes!
This recipe is ideal for busy weeknights or weekend get-togethers with friends and family. It’s also highly customizable—so everyone can add their own favorite toppings and sauces, making it a crowd-pleaser for all ages.
Why You’ll Love This Recipe
- Quick and Easy: Cheeseburger quesadillas come together in no time! Minimal prep, simple ingredients, and easy-to-follow steps mean you’ll have dinner ready in a flash.
- Kid-Approved: The quesadilla format makes these perfect for little hands and picky eaters. Kids love the cheesiness and the crispy tortilla, and you can keep the ingredients as basic or as loaded as you like.
- Bursting with Flavor: With a balance of melty cheese, seasoned beef, and classic burger condiments like ketchup, mustard, and pickles, each bite is packed with flavor.
- Perfect for Meal Prep: These quesadillas store well, so you can make extras to reheat for lunch or dinner later in the week.
Preparation Time and Servings
- Total Time: 25-30 minutes (15 minutes prep, 10-15 minutes cook)
- Servings: 4 large quesadillas (serves about 4-6 people)
- Calories per serving: Approximately 480 calories (based on 1 large quesadilla)
Ingredients
For the Filling:
- 1 lb ground beef (use 85% lean for the right balance of flavor and juiciness)
- 1 tsp garlic powder
- 1 tsp onion powder
- 1/2 tsp salt
- 1/4 tsp black pepper
- 1/4 cup ketchup
- 2 tbsp mustard
- 2 tbsp mayonnaise (optional, for extra creaminess)
For the Quesadillas:
- 4 large flour tortillas (10-12 inch size; whole wheat or gluten-free also work well)
- 1 cup shredded cheddar cheese (or a blend of cheddar and mozzarella for extra melt)
- 1/4 cup diced pickles (adds that signature tangy cheeseburger flavor)
- 1/2 cup shredded lettuce (optional, for garnish)
- 1/2 cup diced tomatoes (optional, for garnish)
- Olive oil or butter for cooking
Step-by-Step Instructions
1. Cook the Ground Beef
- In a large skillet over medium heat, add the ground beef.
- Sprinkle in the garlic powder, onion powder, salt, and pepper. Use a spatula to break up the meat into small crumbles as it cooks.
- Stir occasionally and cook until browned and fully cooked through, about 5-7 minutes.
- Once cooked, drain any excess grease from the skillet, if needed. Transfer the beef to a mixing bowl.
- Add the ketchup, mustard, and mayonnaise to the beef, stirring until well combined. This will help infuse each bite with classic cheeseburger flavor.
2. Prepare the Tortillas
- Lay out the tortillas on a clean surface.
- Spread a thin layer of the beef mixture over one half of each tortilla.
- Sprinkle about 2 tablespoons of shredded cheese over the beef mixture, ensuring it covers the filling evenly.
- For a tangy, pickle-y bite, add a few diced pickles on top of the cheese layer.
3. Fold and Seal
- Fold each tortilla in half to create a half-moon shape, pressing gently to ensure it sticks together.
- The cheese will act as a binder, helping the tortilla to stay closed as it cooks.
4. Cook the Quesadillas
- Heat a large skillet or griddle over medium heat. Add a small amount of olive oil or butter to the pan to help the quesadillas brown and get extra crispy.
- Place one or two quesadillas in the skillet, depending on its size. Cook each quesadilla for 2-3 minutes per side or until golden brown and crispy, and the cheese has melted.
- Transfer the cooked quesadillas to a plate lined with paper towels to absorb any excess oil. Repeat with the remaining quesadillas.
5. Slice and Serve
- Let the quesadillas cool for a minute, then use a sharp knife or pizza cutter to slice each one into three wedges.
- Garnish with shredded lettuce, diced tomatoes, and extra pickles for a fresh crunch. Serve with additional ketchup, mustard, or even a dipping sauce like ranch or burger sauce.
How to Serve Cheeseburger Quesadillas
For the full experience, pair your cheeseburger quesadillas with some tasty sides and garnishes:
- Classic Cheeseburger Style: Serve with ketchup and mustard for dipping. Garnish with shredded lettuce, diced tomatoes, and pickles.
- Loaded Option: Add toppings like sour cream, guacamole, or even jalapeños for a spicy kick.
- Family-Style: Cut the quesadillas into smaller pieces and serve on a large platter with different dipping sauces—great for parties or game days.
- Side Dishes: A small side salad, fries, or potato wedges pairs perfectly for a complete meal.
Additional Tips for Perfect Cheeseburger Quesadillas
- Use Fresh Tortillas: Fresh tortillas are easier to fold and don’t break or tear.
- Go Easy on the Fillings: Overloading with fillings can make the quesadillas tricky to flip and result in spilling.
- Press Down for Even Cooking: While cooking, press down gently with a spatula to help the cheese melt and seal the quesadilla.
- Medium Heat Is Key: This ensures the cheese melts properly without burning the tortillas.
- Keep Warm in the Oven: If you’re making a large batch, keep cooked quesadillas warm in a 200°F oven while finishing the rest.
Recipe Variations
One of the best things about cheeseburger quesadillas is their versatility! Here are a few fun variations to try:
- Spicy Cheeseburger Quesadillas: Add a pinch of red pepper flakes or chopped jalapeños to the ground beef for extra heat.
- Vegetarian Option: Substitute the beef with crumbled veggie burger patties or a mix of sautéed mushrooms and onions for a delicious meat-free version.
- Gluten-Free: Use gluten-free tortillas to make this recipe gluten-friendly.
- Deluxe Cheeseburger: Add crumbled cooked turkey or beef bacon for a smoky flavor, or caramelized onions for sweetness.
- Double Cheeseburger Quesadillas: Layer on an extra slice of American cheese or add more shredded cheddar for extra cheesy goodness.
Freezing and Storage
These cheeseburger quesadillas are excellent for meal prep, so feel free to make extras and enjoy them later!
- Storage: Store any leftovers in an airtight container in the fridge for up to 3 days.
- Freezing: Wrap each quesadilla individually in plastic wrap, then place in a freezer-safe bag or container. They’ll keep well for up to 2 months.
- Reheating: For best results, reheat the quesadillas in a skillet over medium heat or bake at 350°F for 8-10 minutes until warmed through and crispy.
Special Equipment
- Large Skillet or Griddle: A wide skillet or griddle lets you cook multiple quesadillas at once and ensures they brown evenly.
- Pizza Cutter: This is the easiest way to slice your quesadillas into neat, even wedges.
- Wide Spatula: Helps with flipping the quesadillas without spilling the filling.
Frequently Asked Questions
Can I use ground turkey or chicken instead of beef? Yes! Ground turkey or chicken works wonderfully as a leaner option. Just be sure to season it well.
What if I don’t like pickles? No worries! Feel free to skip them, or substitute with onions or jalapeños for a different twist.
Can I make these quesadillas ahead of time? Definitely. Assemble the quesadillas and store in the fridge, covered, for up to a day. Cook just before serving for the best texture.
How do I prevent my quesadillas from getting soggy? Drain any excess grease from the beef, and go easy on the ketchup or mayonnaise. Adding too much moisture can lead to sogginess.
Can I bake these instead of cooking them in a skillet? For a large batch, place them on a baking sheet and bake at 400°F for 5-7 minutes per side until golden and crispy.
Conclusion
Cheeseburger quesadillas are the ultimate comfort food mashup, bringing together two favorites into one cheesy, crispy bite. They’re easy to make, endlessly customizable, and perfect for any meal or occasion. Plus, they reheat well, so you can enjoy them again and again.
I hope this recipe becomes a new favorite in your household, just like it has in mine! Don’t forget to snap a photo and tag me on Instagram—I’d love to see how your cheeseburger quesadillas turn out! Happy cooking!

Cheeseburger Quesadillas
- Author: TAYLOR HARRISON
- Total Time: 25 minutes
- Yield: 4 quesadillas (serves 4-6 people)
Description
A delicious fusion of classic cheeseburger flavors and the crispy goodness of a quesadilla. Perfect for a quick and comforting meal, these quesadillas are filled with seasoned ground beef, melty cheese, and tangy pickles, all wrapped up in a golden-brown tortilla.
Ingredients
– 1 lb ground beef
– 1 tsp garlic powder
– 1 tsp onion powder
– Salt and pepper
– 1/4 cup ketchup
– 2 tbsp mustard
– 2 tbsp mayonnaise (optional)
– 4 large flour tortillas
– 1 cup shredded cheddar cheese
– 1/4 cup diced pickles
– Olive oil or butter for cooking
Instructions
1. In a skillet over medium heat, cook ground beef with garlic powder, onion powder, salt, and pepper until browned.
2. Stir in ketchup, mustard, and mayonnaise (optional) and set aside.
3. Spread beef mixture on one half of each tortilla; sprinkle with cheese and pickles.
4. Fold each tortilla in half and cook in a skillet over medium heat until golden brown on both sides.
5. Slice and serve with additional garnishes if desired.
Notes
– For extra flavor, add a handful of diced onions or bell peppers to the beef.
– Feel free to customize with other cheeses or even add bacon for a twist!
- Prep Time: 15 minutes
- Cook Time: 10 minutes
